The remote viewing software called "Nemon" is the content management software for our Nubix RT, Orbix MX, and Nubix DLX product lines. This software lets you manage multiple DVRs and cameras with ease, and automates many daily functions, freeing your surveillance personnel from tedious and repetitive chores. It is included in the box when you purchase a DVR. The latest version of this CMS can be downloaded from our on-line support site (CCTVSUPPORTSITE.COM) at any time. Or, you can download the version we used to create this page here -- Nemon2. As of 6/16/13, this is the latest version.
Please note these DVRs have a browser-based interface (web server) built into firmware. This lets people who know the IP address and have the proper user name/password log on to the DVR with MS Internet Explorer, Mozilla Firefox, and Apple Safari, without the need for Nemon CMS or any other additional software. While this gives users the ability to view cameras and perform other functions, this type of interface does not offer the full features of Nemon CMS.
Start at the Beginning
Install the Nemon software either from the DVD or download it. If you are using the DVD, you'll need to open it with file manager and copy it to your computer (let's say you copy it to the desktop).
There are several files on the DVD. The current DVD version holds the following files (your version may differ slightly). Please note that the downloads offered here are all current as of 06/16/13.
- DigitalSignageMaker_Setup (download)
- NemonNetworkArchiver_Setup (download)
- Nemon2Setup (download)
- Nubix_Series_Quick_Guide
- Nubix_Series_UserManual
Run Nemon2Setup, or whatever number appears (it could be Nemon3_Setup, for instance, in future versions). If your computer lets you see the file extension, you can see that it's an .exe file and the file type is "Application". Depending on your PC configuration, you may be able to run it from the DVD. If not, copy it to your desktop as previously suggested. (Some versions of Windows may also require you to run this as Administrator.
After the installation is complete, launch Nemon(x). Click
through any final verification screens that appear.
NOTE: Most computers will
install and run Nemon CMS flawlessly at this point. Others may
require you to reboot, and then launch Nemon from the shortcut on
your desktop or your program list.
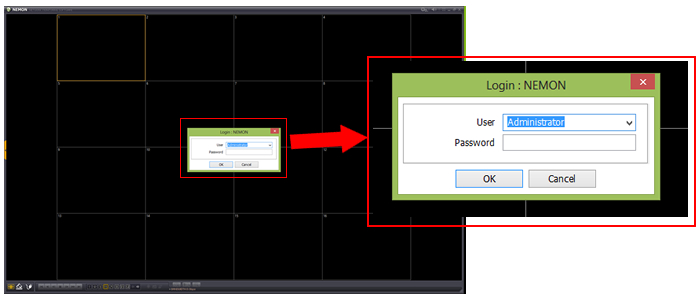
The first time you start Nemon CMS, you'll see the opening screen. ADMINISTRATOR is the default user. Leave the password box empty, just click OK.
Don't Get Confused
In the following text, we will be discussing passwords and user names for two different things. First, for the Nemon CMS software. Everyone who runs this software will need a user name and password. This is NOT the same user name and password in the DVR.
The DVR has its own list of user names and passwords. These have nothing to do with the Nemon CMS user names and passwords.
Logging In To Nemon CMS Software
The LOGIN screen you get when you start Nemon CMS immediately asks for a user name/password. THIS password secures the Nemon software only. Familiarize yourself with this opening screen. It contains the tools you need to learn how to us.
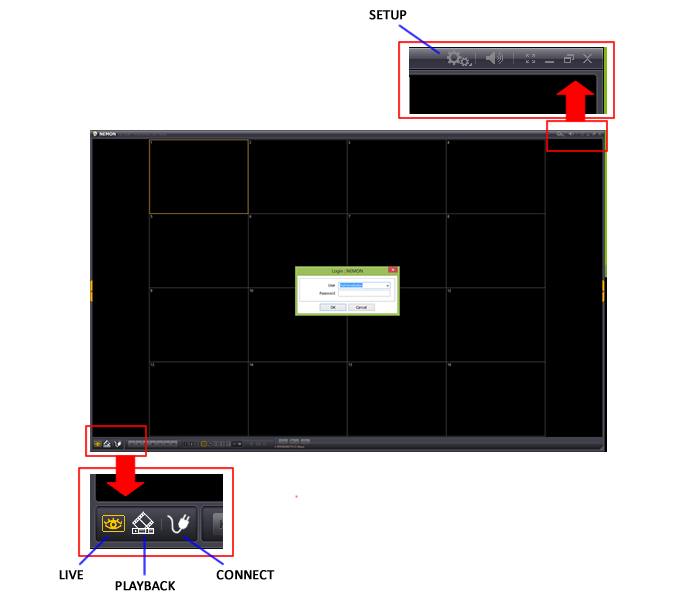
Locate the icons shown below. SETUP, LIVE, PLAYBACK & CONNECT.
Connect to a DVR
You need four things to connect to a DVR.
- User name (for DVR)
- Password (for DVR)
- DVR IP address
- DVR Port number
When ready, click CONNECT. The screen shown below will appear.

Click ADD. You see the following.
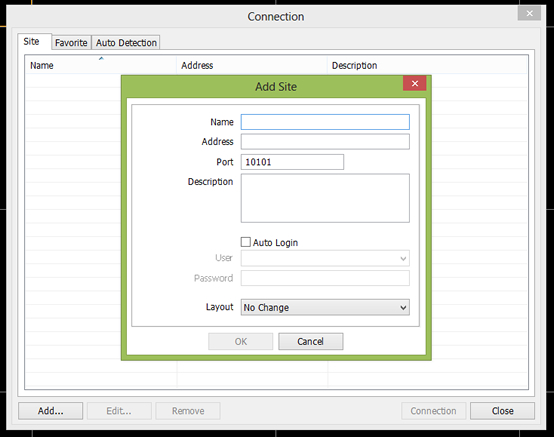
Name: anything you like to describe the DVR - Joe's Crab Shack Parking Lot, etc.
Address: IP number of the DVR
Port: default is 10101, and should appear automatically. Determining the port number for complex installations is beyond the scope of this procedure. If your location has one DVR connected to a router, connected to the internet, the default port number should work. If not, consult a networking specialist. (Experienced users may use the AUTO DETECTION tab, but that function is not covered in today's article.)
Description: anything you like.
Auto login: Check this box, or you will be asked to provide the logon User name and password every time you select this Site. If that sounds ok to you, then leave it unchecked.
User and Password: If you check the AUTO LOGIN checkbox, these fields will be where you put your User name and Password FOR THE DVR.
Layout: Determines the camera layout after you connect.
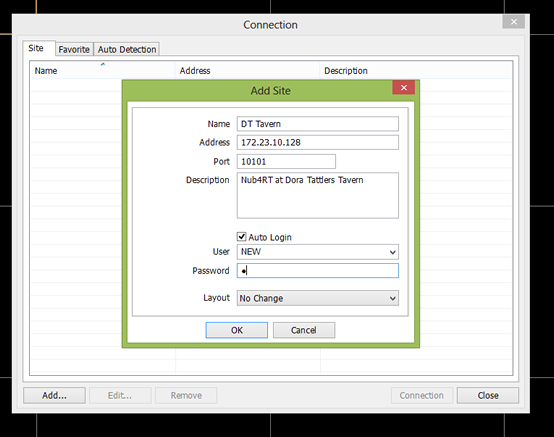
The image above shows a simple example. Click OK when you are ready, and the SITE tab will show your new Site, as shown below.
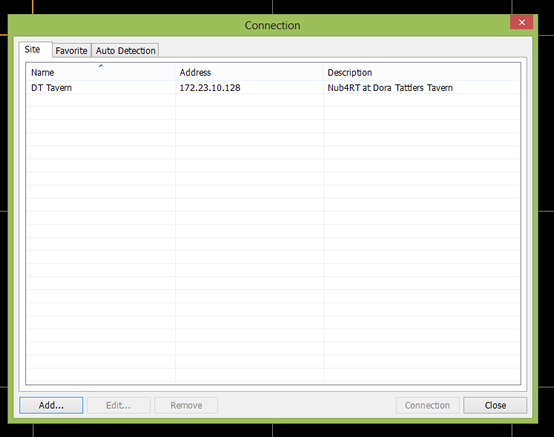
Click the name of the site you created, then click the CONNECTION button in the lower right corner (it will no longer be greyed-out once you click the site name).
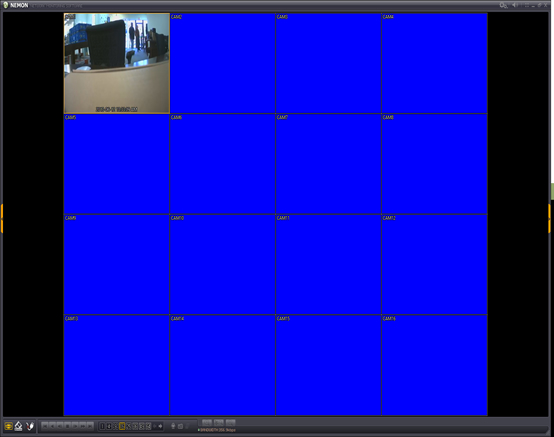
Our simple example site has one camera. Not a lot to look at. To disconnect, click the CONNECT button in the lower left corner of the screen.
All sites, no matter how many cameras they have, are added in a similar fashion.
Favorite & Auto Detection
These functions let you create a list of favorite Sites and Camera views, and provide an Auto-Detection utility that can help users connect to DVRs that are connected locally (not across the internet). For more information, bookmark this page and check back for an expansion, which we will be adding shortly.
Setting Your Nemon CMS User Names and Password
Now is a good time to secure your Nemon CMS software from unauthorized users. Click the SETUP icon in the upper right corner. Two selections appear, SETUP and REMOTE SETUP.
REMOTE SETUP lets you change settings ON THE DVR. We will look at this function in a future installment. For now, click SETUP. A screen like the one shown below appears.
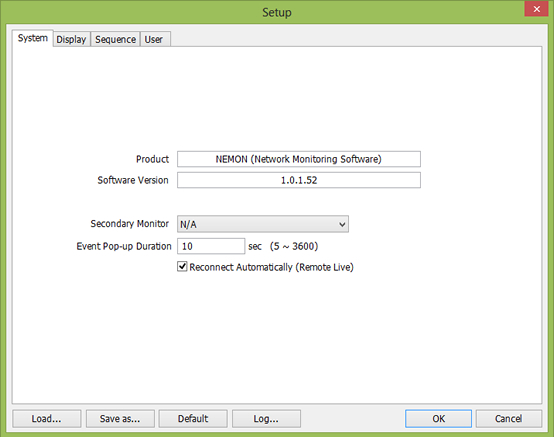
This screen shows important information about the Nemon software, and allows you to change some of the ways it operates. For now, we want to go to the USER tab.
Click the USER tab, and the following screen appears, showing ADMINISTRATOR as the only user. Highlight ADMNISTRATOR (if it is not already highlighted) and you see the rights assigned to the ADMINISTRATOR on the right-side of the window.
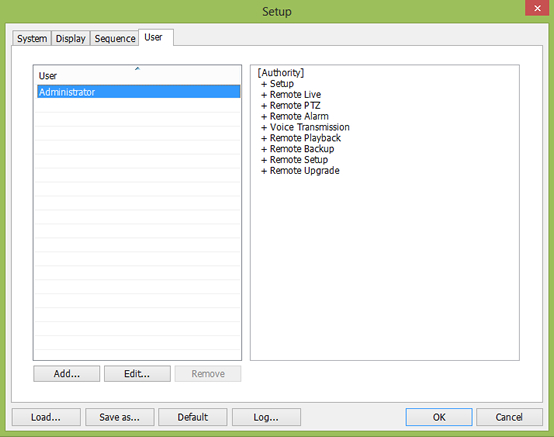
Administrators have all rights to use every function the Nemon CMS software offers. Since this is a new installation, the Administrator has no password associated with it, so let's add one. Click on ADMINISTRATOR to highlight it, then click EDIT.
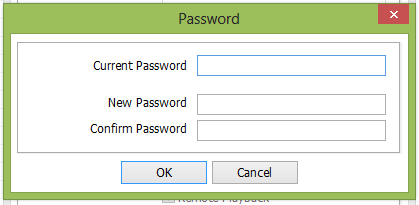
Since there is no CURRENT PASSWORD, leave this field blank. Type your NEW password in the field, and in the CONFIRM field, and then click OK. Next time you start the Nemon CMS software, you will be asked to provide the password for the ADMINISTRATOR user name. Do yourself a big favor now and write the password down. If you're afraid of people finding what you wrote, use a cypher. But most importantly, WRITE IT DOWN NOW.
Add a User Name
You can let others use the Nemon CMS software and prevent them from making changes to your configuration by giving them their own user name and password, and assigning ONLY the rights they need to view cameras, or playback files, etc.
In the USER tab of the SETUP window, click ADD.
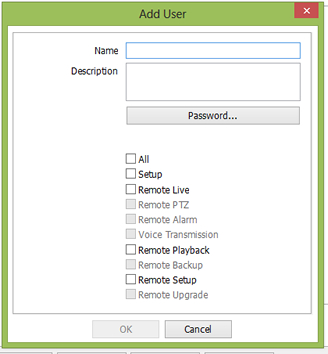
Add your name, a description and click PASSWORD to set up a password (write it down). Then assign rights to the new user using the checkboxes. Note that some checkboxes are greyed-out until they become valid. For instance, check REMOTE LIVE and the greyed out selections REMOTE PTZ, REMOTE ALARM, and VOICE TRANSMISSION become "selectable" (but are not automatically checked).
Use care when assigning rights. Remember that SETUP gives users the ability to change the Nemon CMS configuration, including add and change users and passwords. A curious and untrained person could easily render the software useless, requiring you to re-install it and repeat your work. And if you let them access REMOTE SETUP, they can change the DVR user names and passwords, requiring a lot more effort to fix.
Only super users/administrators should have ALL rights. If you click ALL you will see all of the checkboxes selected.
A Final Word
We can't stress this enough. WRITE PASSWORDS DOWN AS YOU MAKE THEM. Better yet, BEFORE you make them and then read them off of your note. Save the record in a place that is safe and secure. Lost passwords account for a very large number of technical support calls and are the most frequent problem our technical support team encounters. A lost Nemon CMS password may only require a complete re-installation of the software to fix, while a lost DVR password may require bench time to wipe the firmware (this type of problem is usually not serviceable in the field).
That's all for now. The next installment will look at more SETUP functions and functions in the CONNECT window, and other functions and settings we skipped today.